

The Front Door Wouldn't Even Open — Here's How We Saved the Hardwood Floor
Some hardwood floor refinishing projects in Manchester, Connecticut begin because the finish is worn or the homeowner simply wants a different color.
This one began because there was a hump in the hardwood floor so large that the front door couldn't properly open.
The homeowner was out of town, so I initially met his realtor at the Manchester property to look at the floors and determine what could be done.
It was immediately apparent that this house needed more than sanding.
The property had not been maintained particularly well and appeared to have experienced considerable moisture. Right inside the entrance, the hardwood had pushed upward and created a significant hump.
The floor needed to be repaired before we could even think about refinishing it.
But there was another issue we needed to consider.
If we simply removed a large section of old oak flooring and filled the entire area with brand-new wood, the repair could stand out dramatically against the older floor.
We wanted a better solution.
THE REPAIR TAKES SHAPE
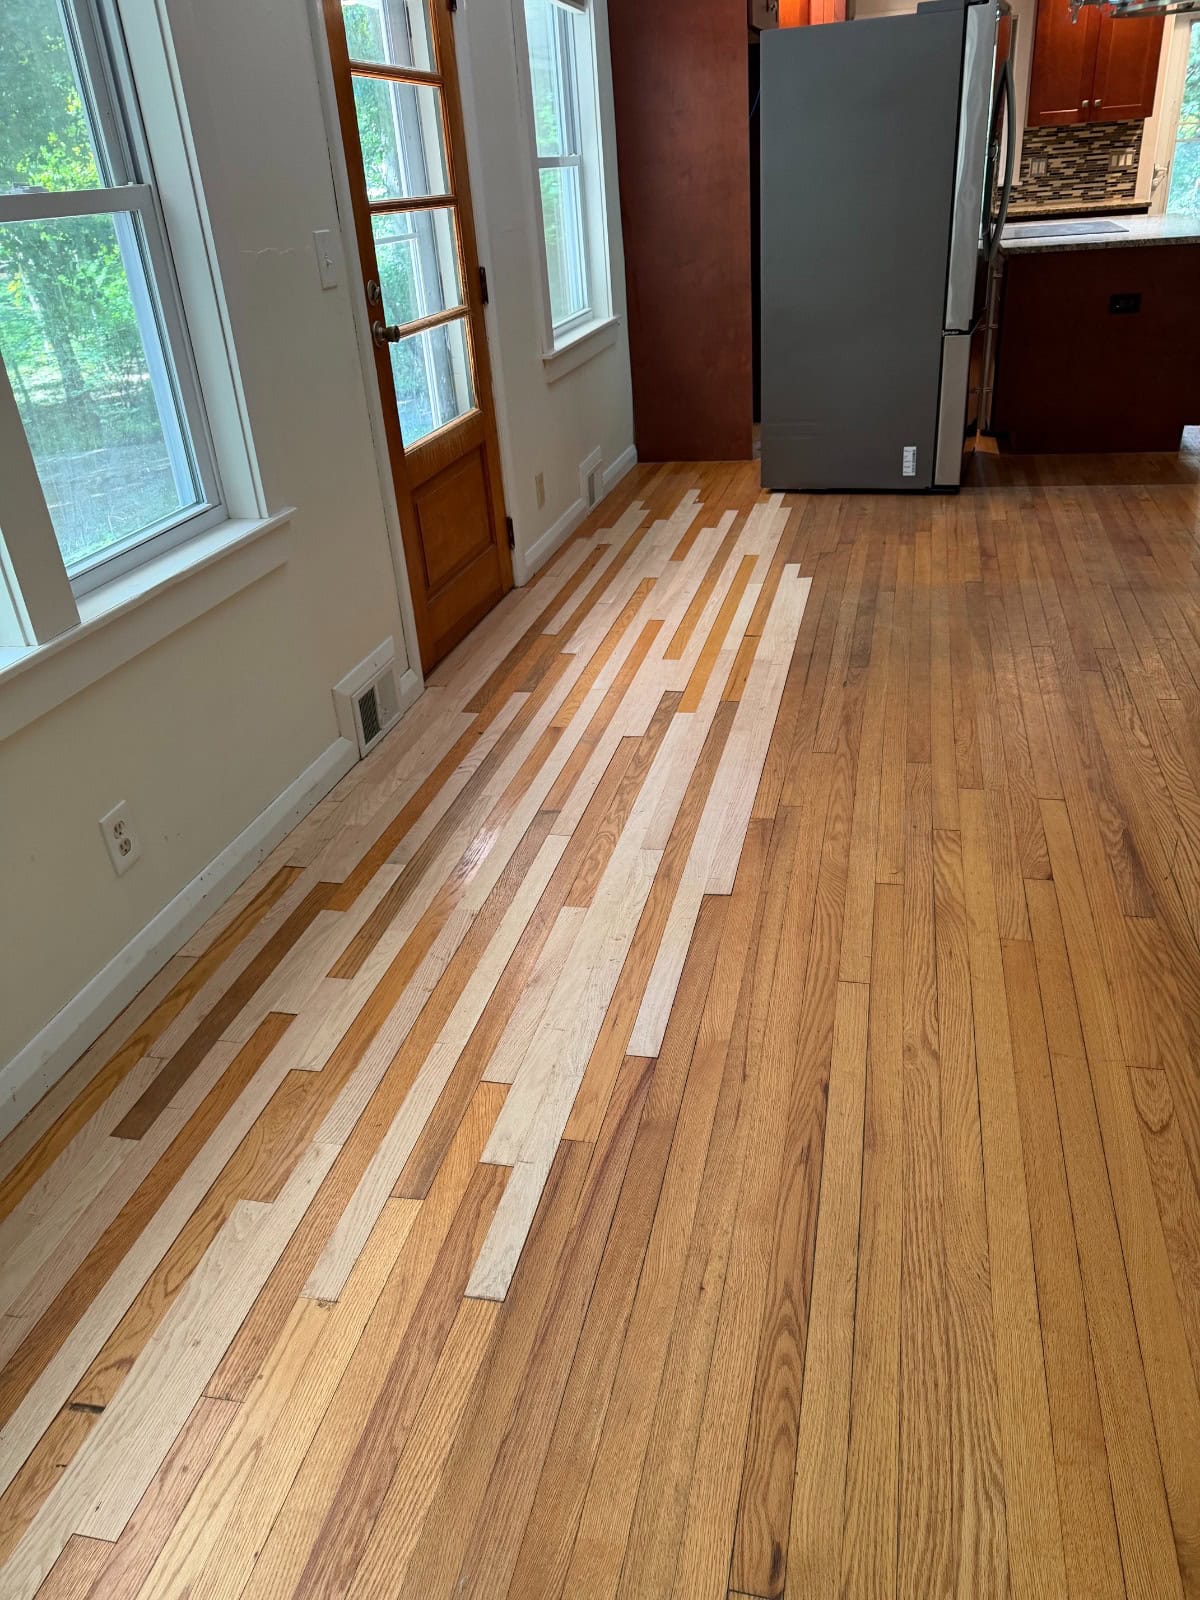
This photograph tells one of the most important parts of this project.
Instead of cutting out the damaged section and installing a square patch, we toothed and weaved the replacement hardwood into the existing floor.
Individual boards were removed at different lengths so the new material could follow the staggered pattern of the original hardwood installation.
We also reused suitable existing boards where practical.
Why go through the extra work?
Because the objective of a good hardwood floor repair isn't simply to fill the hole.
It's to make your eye stop looking for the repair.
At this stage, the new oak is obviously lighter because it hasn't aged or been finished like the surrounding floor. But after the entire area is professionally sanded and refinished, those differences can become considerably less noticeable.
This Wasn't a Refinishing Job Until the Repair Was Right
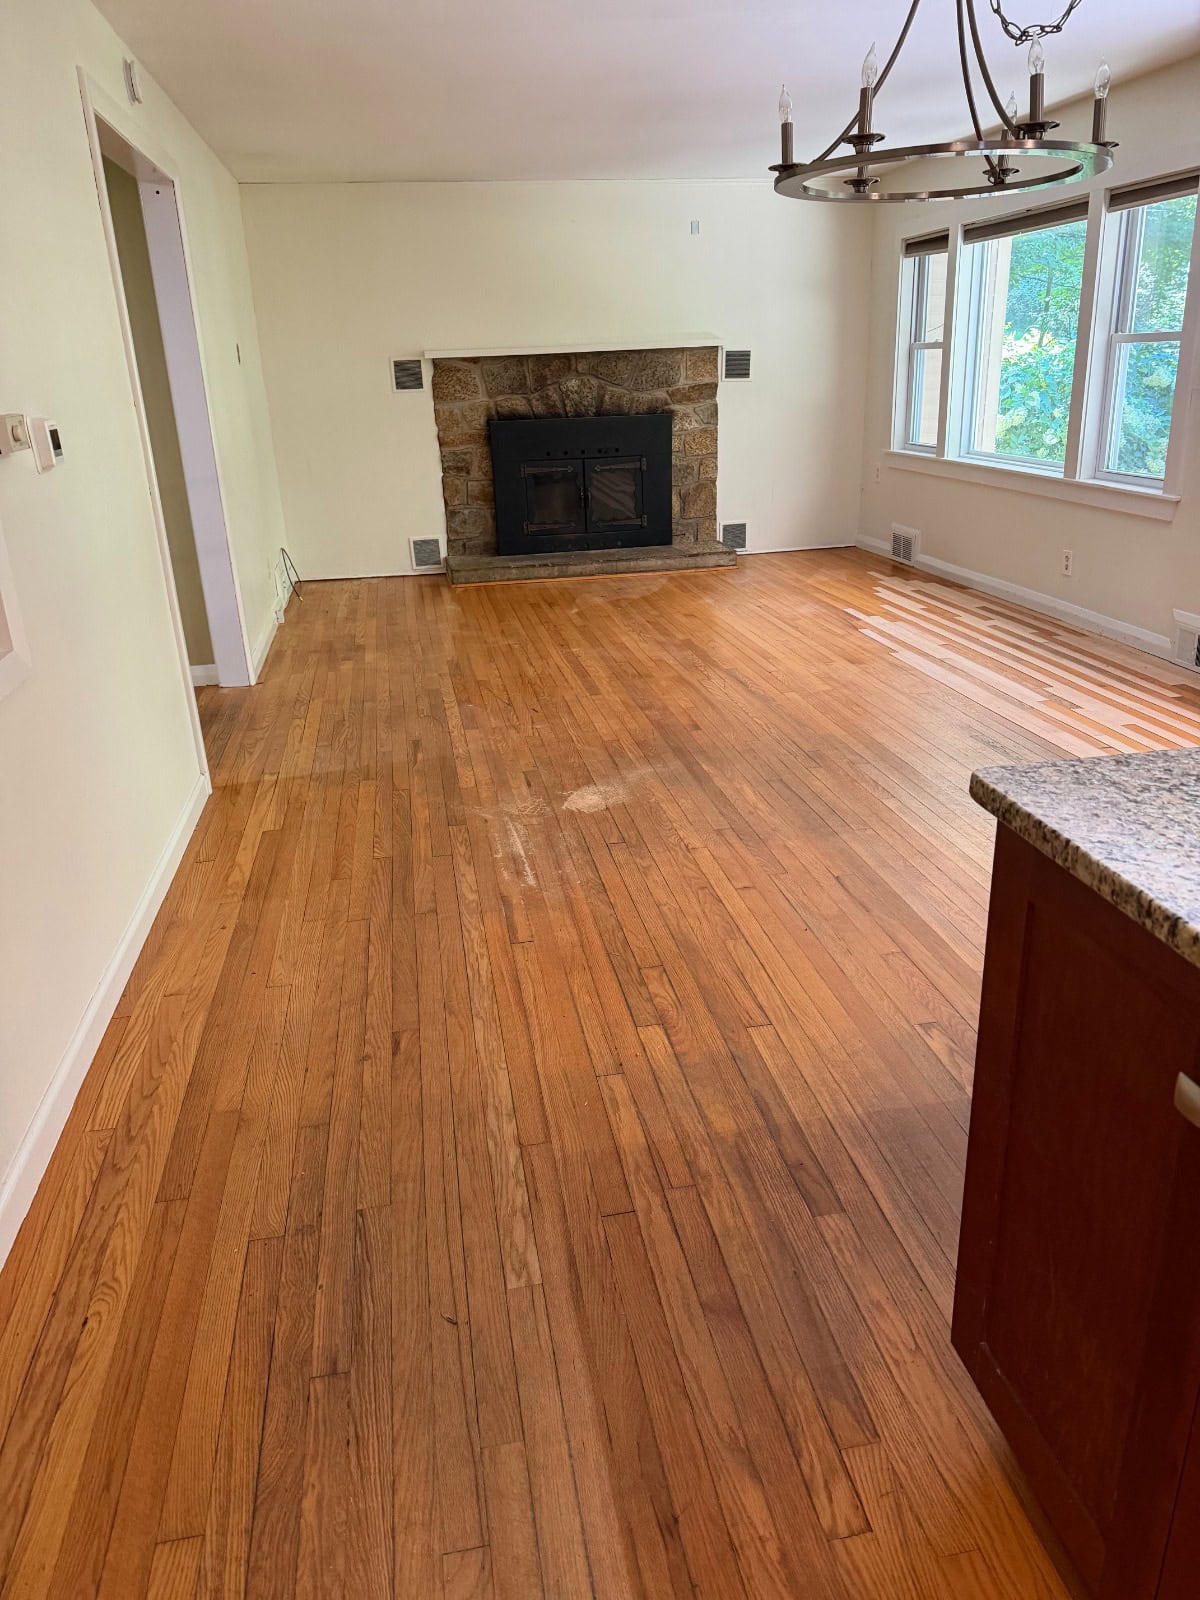
Looking across the house before sanding, the flooring made the entire interior feel much older.
The existing finish had aged and darkened, there was considerable wear, and there were areas that required repair.
The difference between these "before" photographs and the final photographs is one of the reasons we like documenting actual projects.
These are the same hardwood floors.
They didn't need to be covered.
They didn't need to be torn out and replaced throughout the house.
They needed the right repairs followed by proper hardwood floor sanding and refinishing.
Hidden Damage Matters
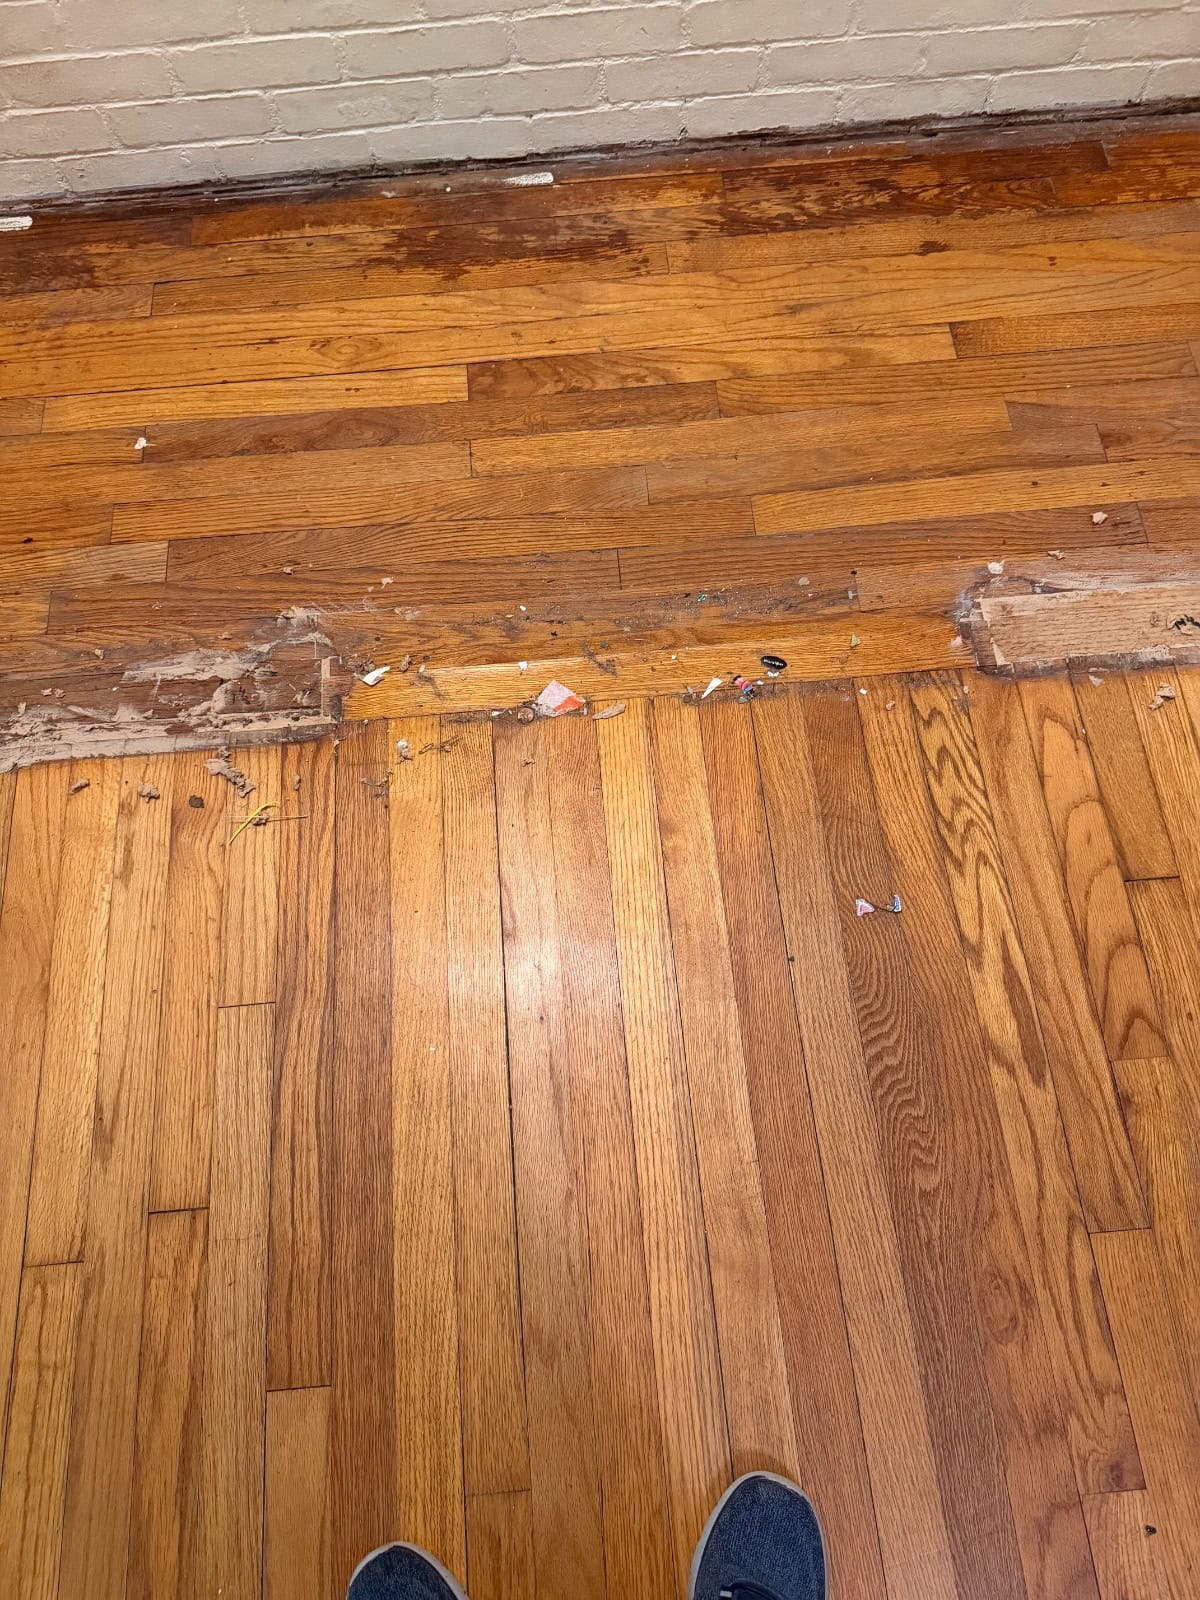
This close-up shows why we inspect an older hardwood floor before deciding that sanding alone will solve everything.
There were areas of deterioration and previous wear that had to be evaluated separately from the finish itself.
Not every dark spot requires a board replacement, and not every imperfect board should automatically be removed.
We determine what can reasonably be preserved, what can be improved through sanding and what actually requires hardwood floor repair or board replacement.
That approach preserves more of the original floor and keeps unnecessary new material to a minimum.
We Started the Repairs on Saturday
Because the repair had to be completed before the refinishing process could begin, we started this Manchester project on a Saturday.
That allowed us to concentrate on the damaged areas and get the floor structurally ready for sanding.
We returned Monday and began the complete sanding process.
Professional dust-containment equipment was used during sanding to capture a substantial amount of the airborne sanding dust at the source and keep the project cleaner.
Once we removed the old finish, another transformation started becoming visible.
The dark, tired-looking floor wasn't necessarily dark wood.
Underneath was beautiful natural oak.
AFTER SANDING
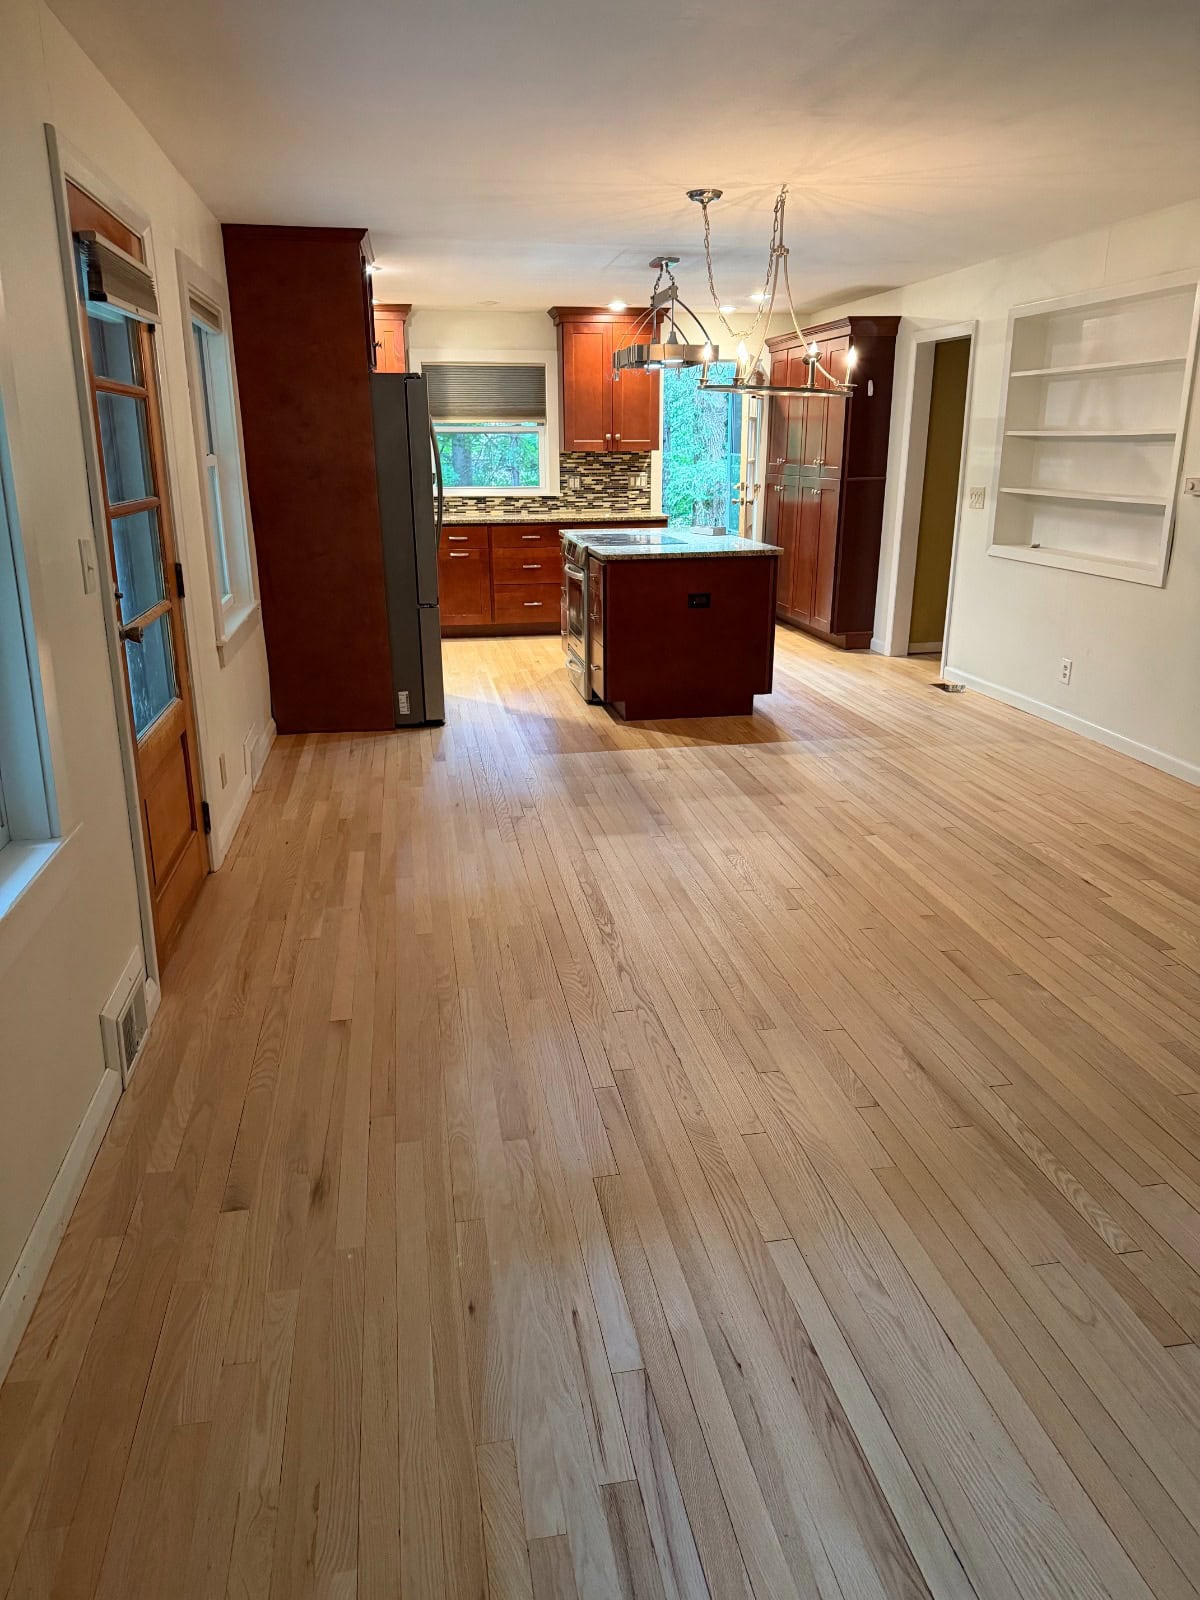
This is one of my favorite stages of a refinishing project.
Compare this photograph to where we started.
Once the old coating was removed, the natural character and variation of the oak became visible again.
Even before finish, the house already looked completely different.
What About the Repaired Area?
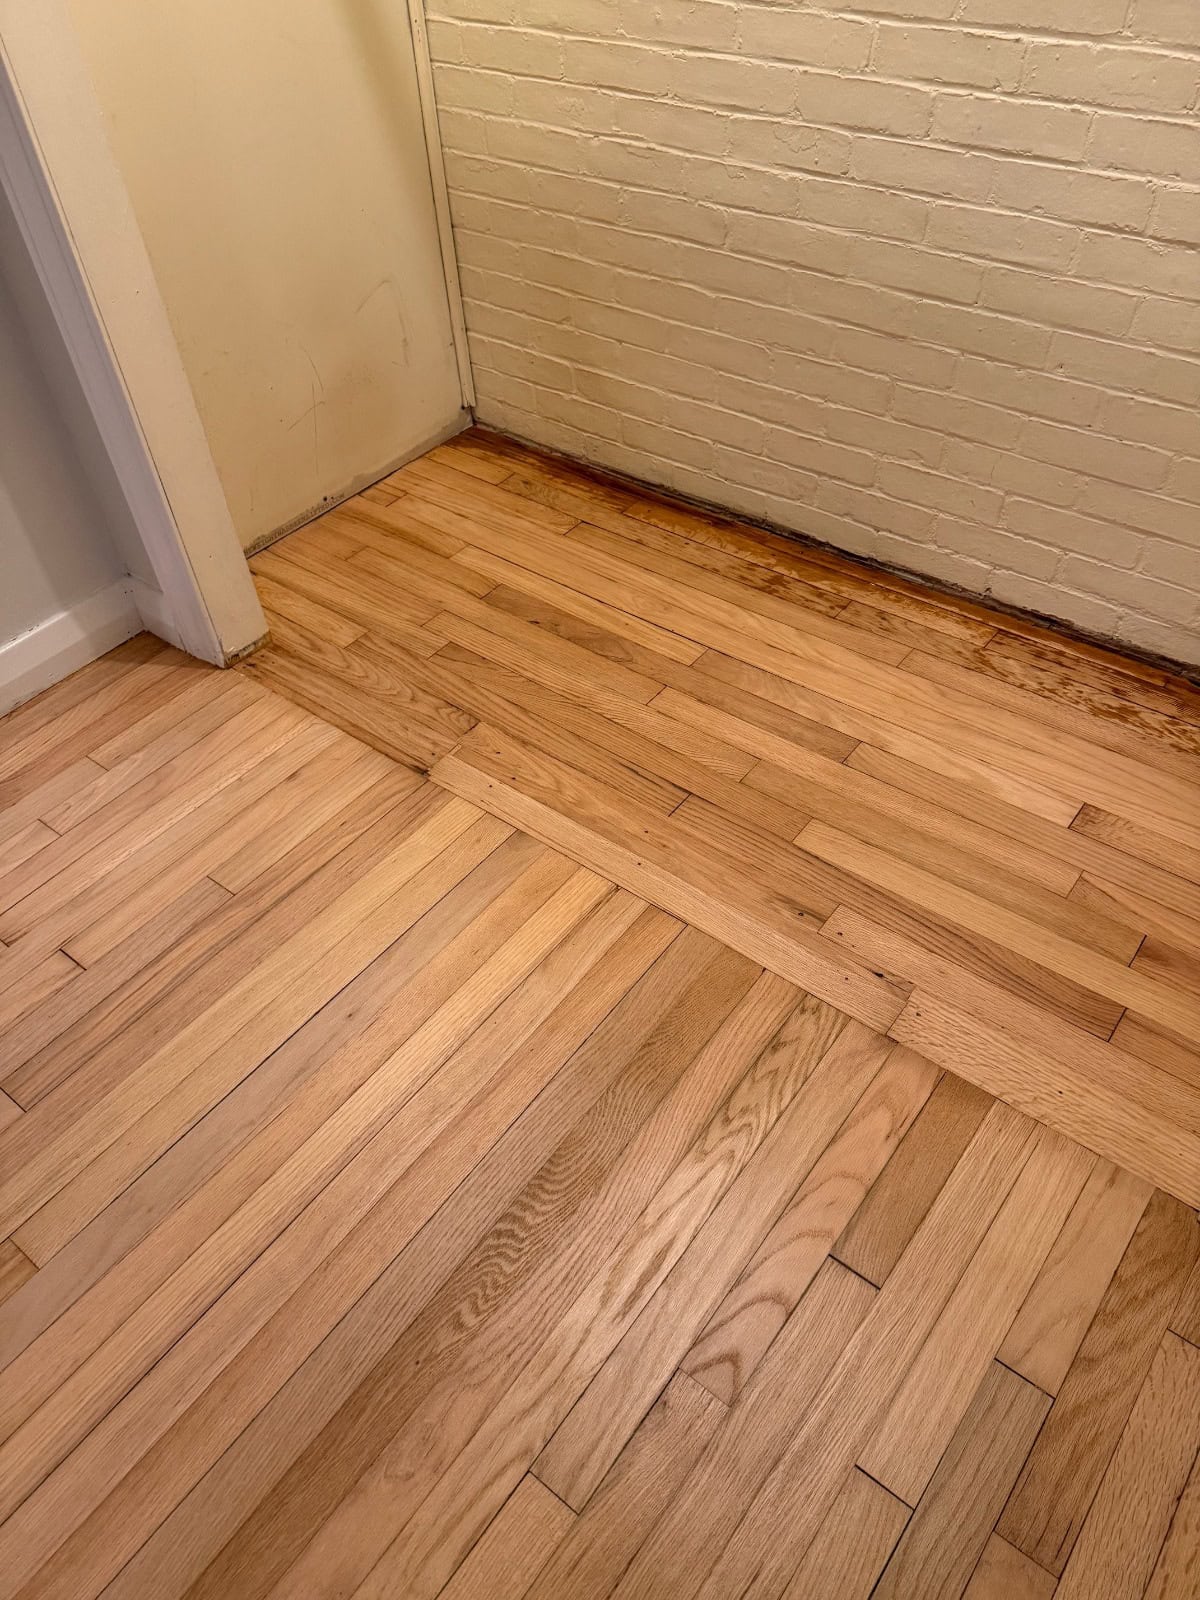
The flooring is now sanded together as one surface.
There will naturally be variation between older and newer pieces of wood—real hardwood isn't manufactured to look identical board after board—but the repair doesn't create one large rectangular patch.
The staggered boards help it blend into the existing installation.
Now we were ready for finish.
Keeping the Oak Light With Bona NaturalSeal
For this Manchester project, we chose Bona NaturalSeal followed by three coats of Bona Mega.
NaturalSeal was a good fit because we didn't want to put the heavy amber/orange appearance back onto the oak that we had just removed.
The water-based system allowed us to keep the floor lighter and closer to the appearance of natural oak while providing the protective finishing system the floor needed.
Water-based finishes also offer lower odor and lower VOCs than traditional oil-based polyurethane, which can be particularly useful when working inside an occupied home.
From the Saturday repair work through sanding and finishing, the project was completed on a tight schedule, with the main sanding and finishing portion completed over three days.
And throughout the job, communication was especially important because the homeowner wasn't at the property.
A Project Managed From Out of Town
One of the things I remember about this job was how much communication went into it.
I originally met the realtor because the owner was away.
As the project progressed, I spoke several times with the owner's son as well as his mother and father. We talked through what we were finding, what we were doing and how the project was progressing.
That's an important part of doing this type of work.
A homeowner shouldn't have to be standing beside us every hour to know what's happening in their house.
By the time we were finished, the family had seen the transformation unfold.
And they couldn't have been more pleased with the outcome.
From a House That Looked Old and Neglected to This
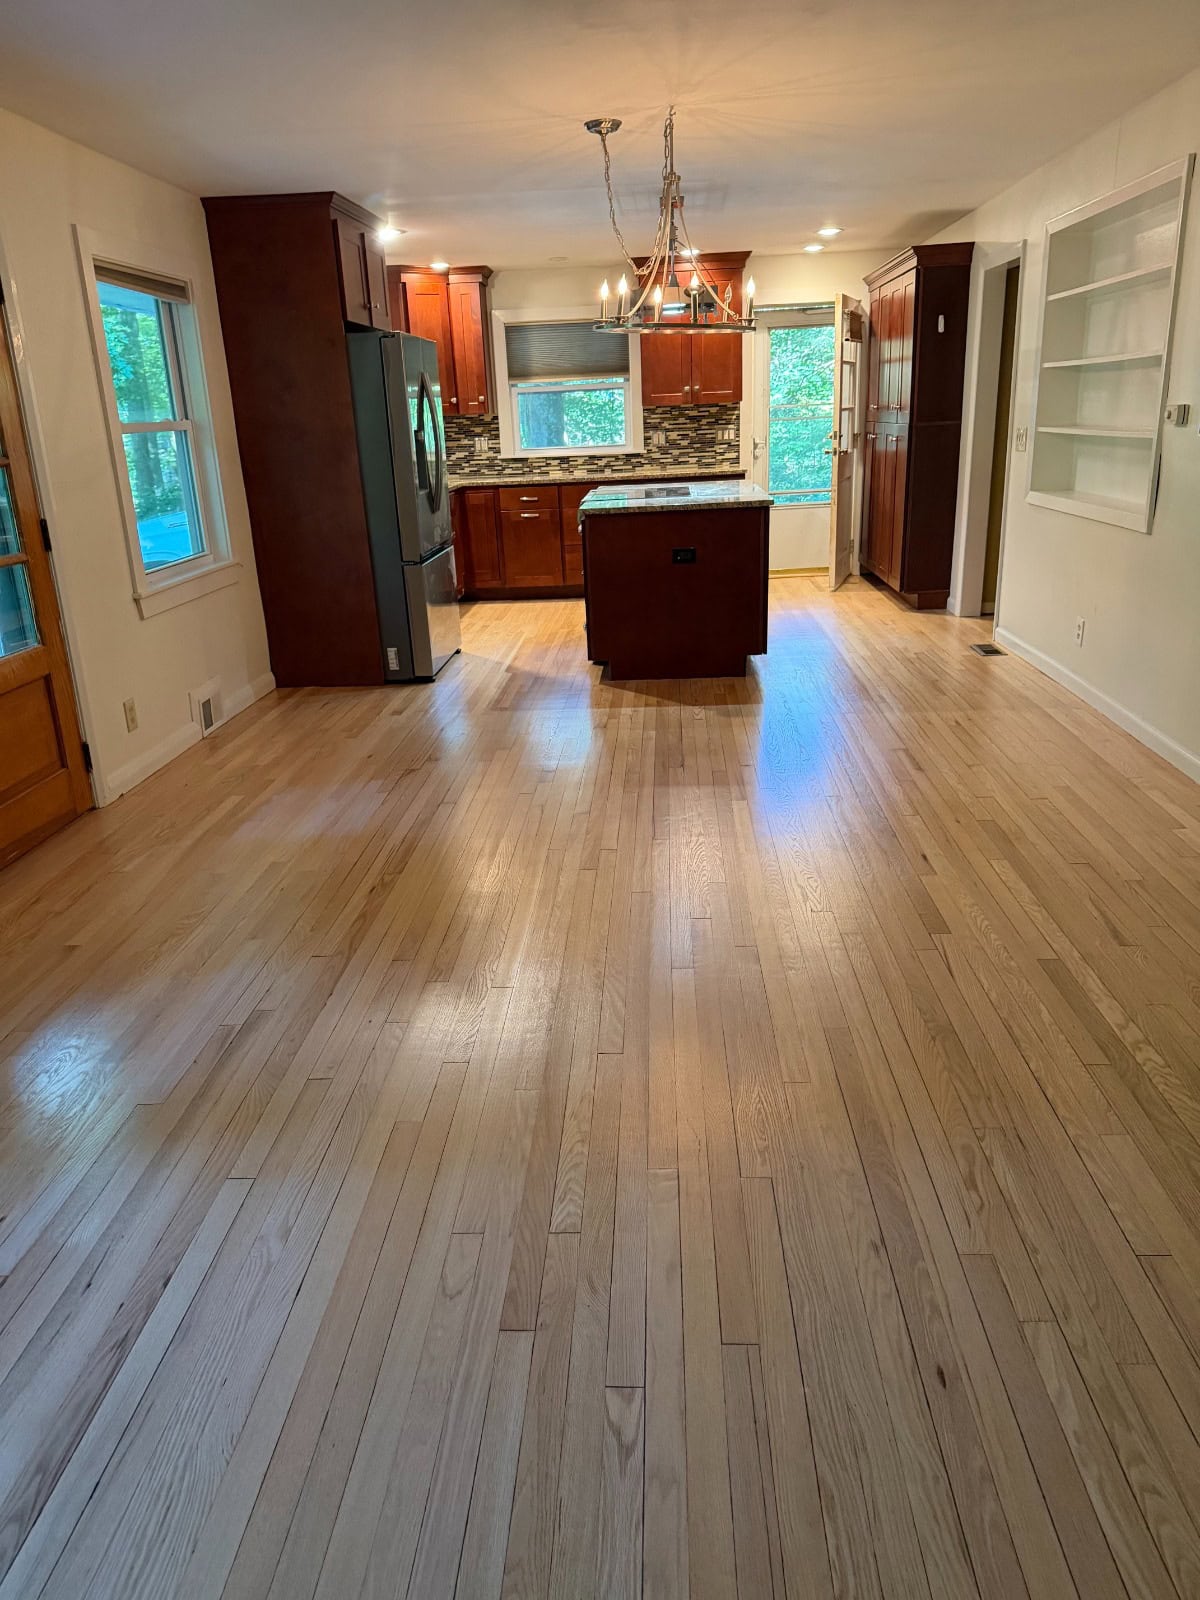
Look back at the photographs from when we first walked into the property.
Then look at this.
The dark, tired appearance is gone. The oak looks clean and natural. The lighter flooring works beautifully against the darker cabinetry, and the entire open area feels brighter.
It's hard to believe we're looking at the same house.
FINISHED FLOOR & FIREPLACE
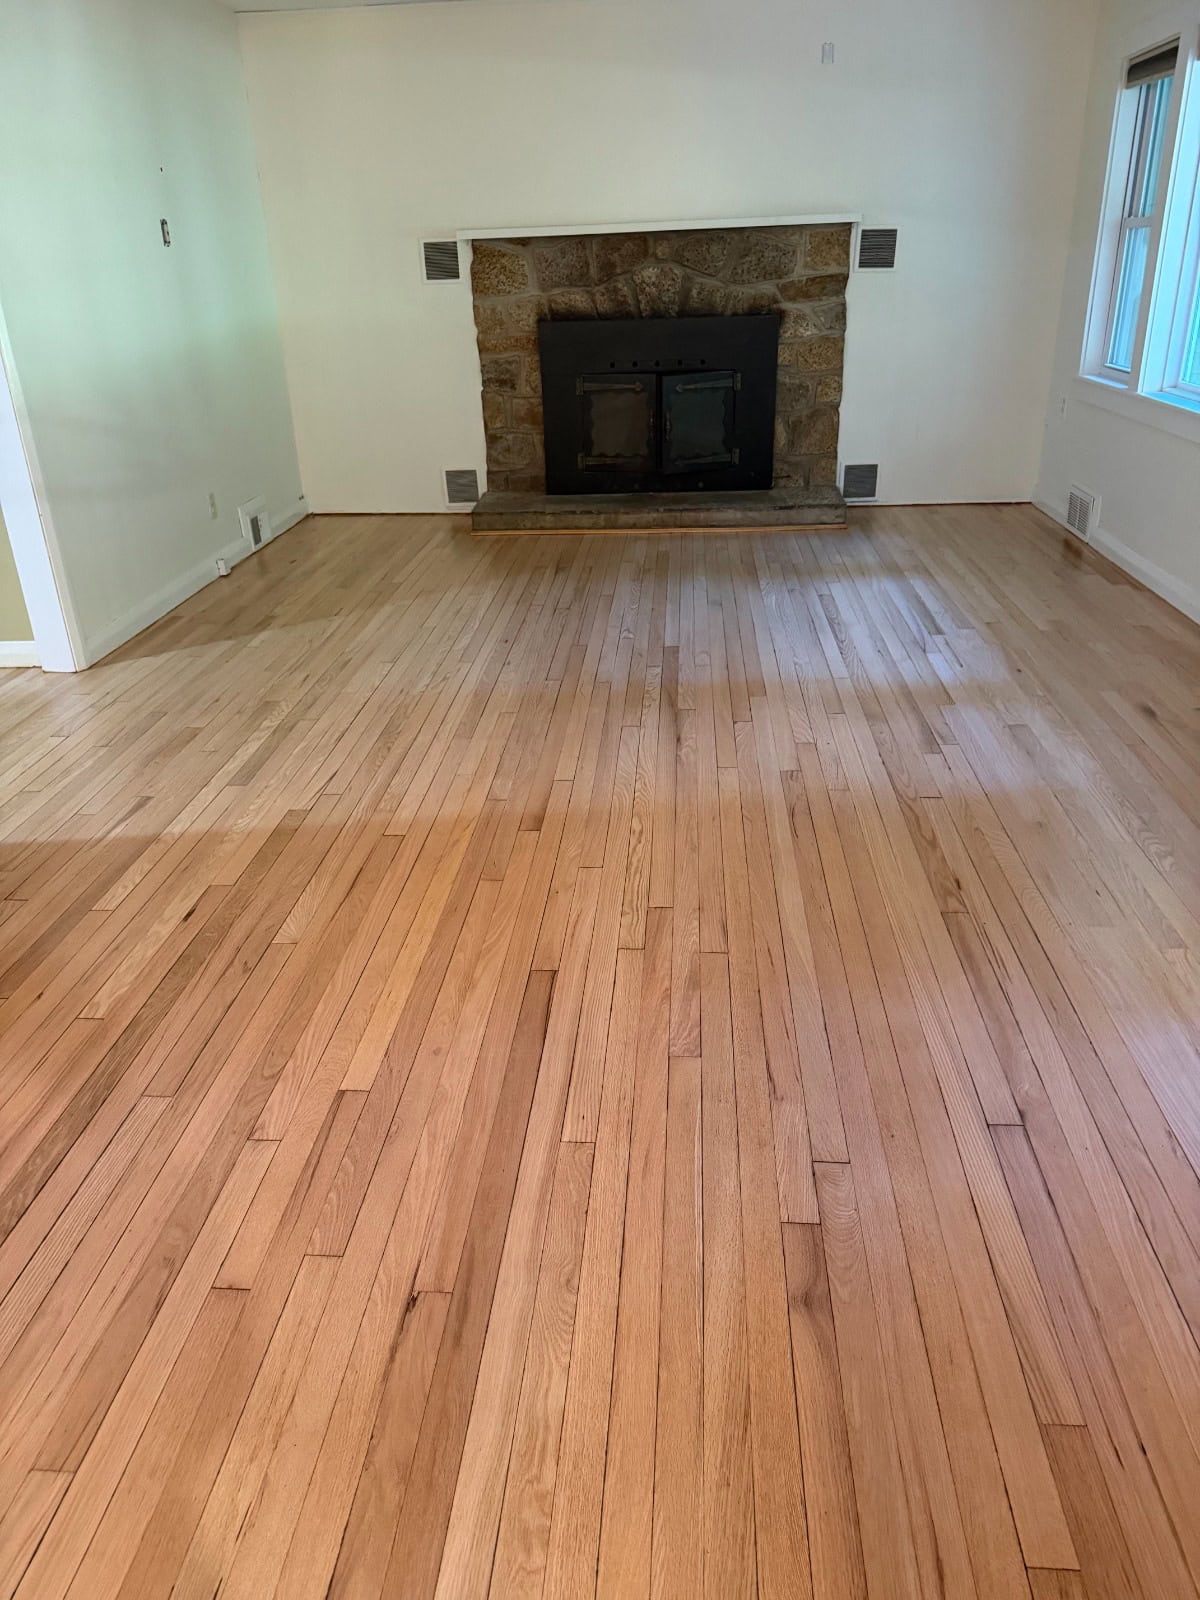
This final view really completes the story.
At the beginning, you could easily have walked into this house and assumed that the old hardwood floors were simply too far gone.
There was moisture-related movement.
There was a major hump at the entrance.
There were damaged areas.
There was extensive wear.
And the overall appearance made the interior feel much older than it needed to.
But underneath all of that was a hardwood floor worth saving.
Repair First. Refinish Second. Replace Only What Needs Replacing.
That's probably the best lesson from this particular Manchester project.
Hardwood floor repair and hardwood floor refinishing are often part of the same job.
If we had simply sanded this floor without properly addressing the raised and damaged areas, we wouldn't have solved the real problem.
If we had replaced large sections unnecessarily, we would have introduced much more new wood into an older floor.
Instead, we repaired the areas that needed attention, toothed and weaved replacement flooring into the original hardwood, sanded the entire floor and then refinished everything as one continuous surface.
The result speaks for itself.
What initially looked like an extremely old, neglected floor now looks like hardwood you could expect to see in a recently updated home.
And most importantly, the family was ecstatic when they saw the finished project.
Hardwood Floor Repair & Refinishing in Manchester, Connecticut
Patrick Daigle Hardwood Flooring, Inc. provides hardwood floor refinishing, wood floor refinishing, hardwood floor repair, hardwood floor sanding, dustless sanding, hardwood floor installation and hardwood stair refinishing throughout Manchester, Connecticut 06040 and 06042 and surrounding central Connecticut communities.
We've worked on hardwood floors throughout Manchester, including areas around Downtown Manchester, Highland Park, Buckland, Manchester Green and the surrounding neighborhoods, as well as nearby South Windsor, East Hartford, Glastonbury, Bolton, Vernon and Ellington.
Our family's hardwood flooring history dates to 1927 in Maine, and our Connecticut operation began around 1972. Four generations later, we're still doing what this Manchester project required: looking at an existing wood floor and determining how much of it can be saved before recommending replacement.
If your hardwood floor has buckled boards, moisture damage, worn finish, damaged sections, scratches, pet stains or areas that need to be woven into the existing flooring, it doesn't automatically mean the entire floor needs replacement.
Sometimes the best hardwood floor is already in the house.
It just needs somebody to bring it back.