
Hardwood Floor Repair & Refinishing – Firetown Road Area, Simsbury CT 06070
Can You Find the Repair? That’s Exactly the Point.
One of the best hardwood floor repairs is the one you can't easily find after the project is finished.
That was our goal with this hardwood floor repair and refinishing project in the Firetown Road area of Simsbury, Connecticut.
When we first met with the homeowner, portions of the existing red oak flooring needed to be repaired and integrated with the surrounding original floor. Simply filling in the open areas with rows of new boards would have left an obvious line showing exactly where the repair had been made.
Instead, we used a traditional hardwood flooring technique commonly referred to as weaving or toothing-in the new flooring.
The individual boards were staggered into the existing floor so there wasn't one straight transition between the old and new wood. We also had to work with the natural differences between the replacement flooring and the older hardwood already in the house.
The objective wasn't to make every individual board identical. With real hardwood, that isn't realistic.
The objective was to make the entire floor look as though it belonged together.
Why Hardwood Repairs Should Be Woven Into the Existing Floor
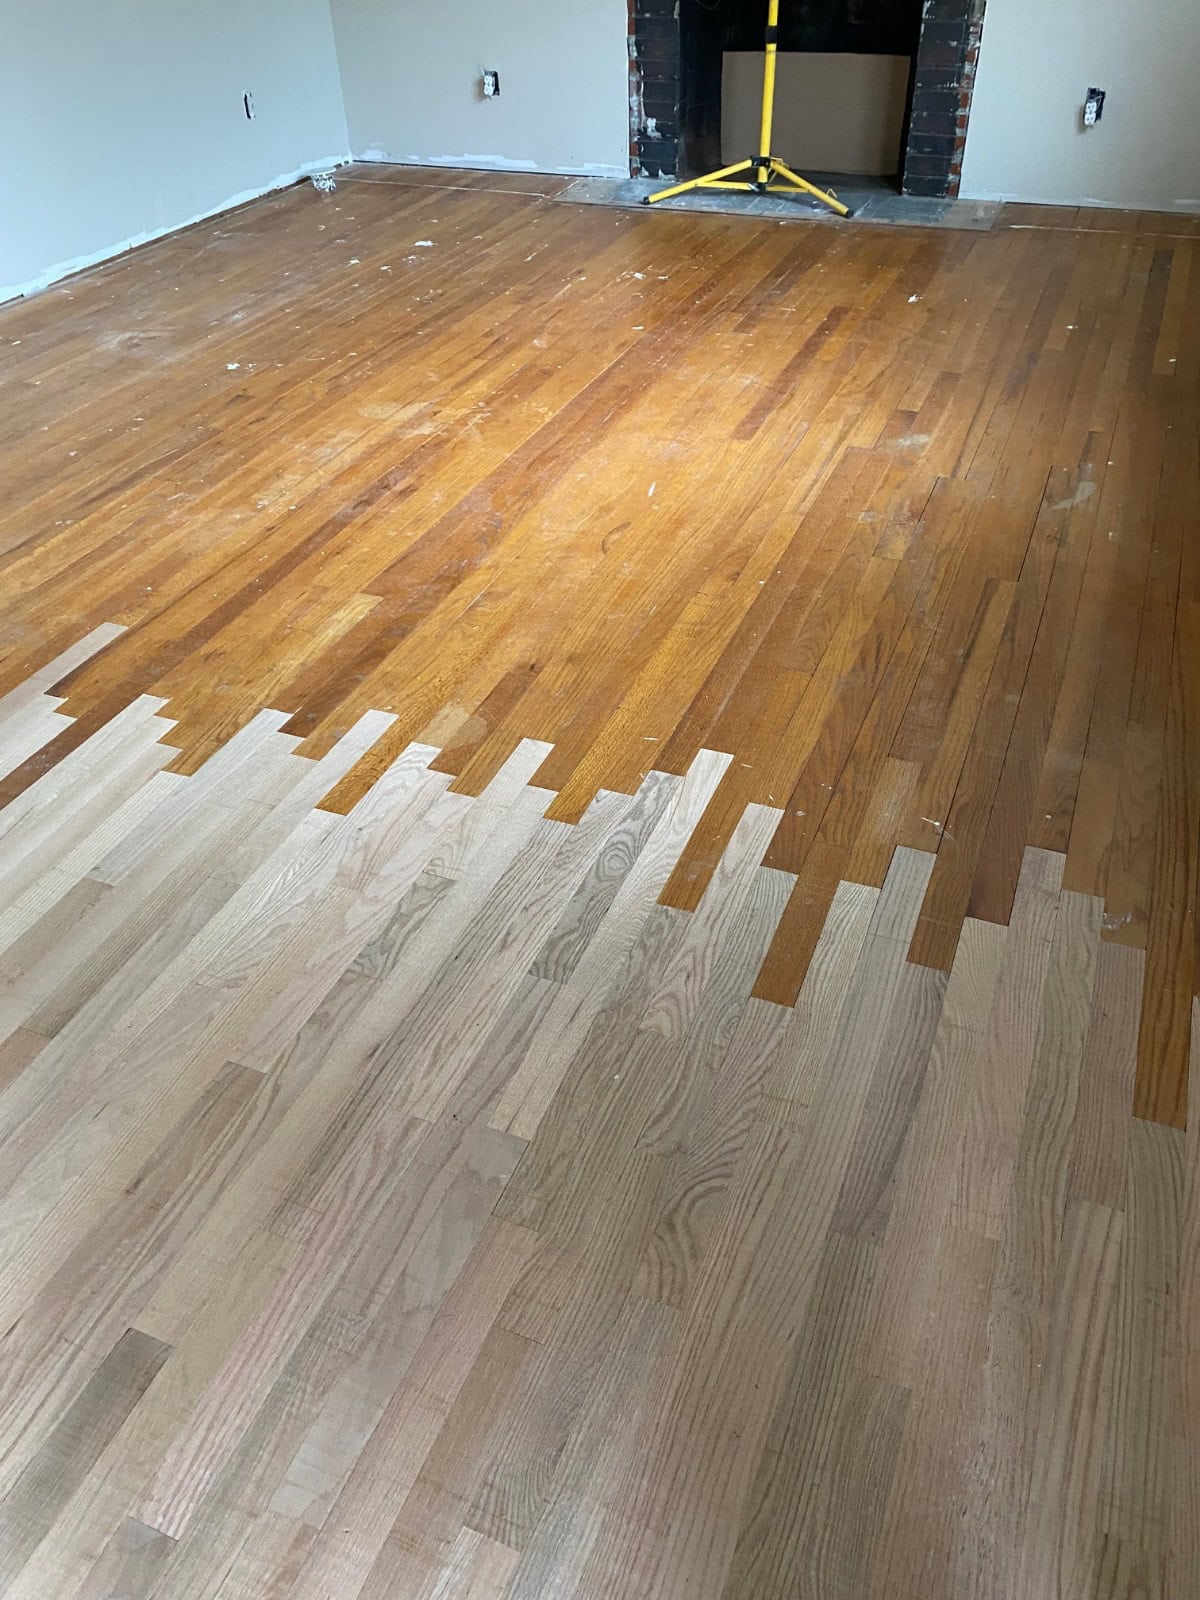
The first photograph tells the story of this project particularly well.
You can clearly see where the newer raw red oak boards have been toothed into the older finished hardwood floor.
Rather than cutting the original floor in a straight line and installing all of the replacement boards from that point forward, selected existing boards were removed at different lengths.
That creates the staggered pattern visible in the photograph.
Once the replacement flooring is installed, the new and existing hardwood can then be sanded together. This helps reduce the visual boundary between the two sections.
Blending New Hardwood With an Older Floor
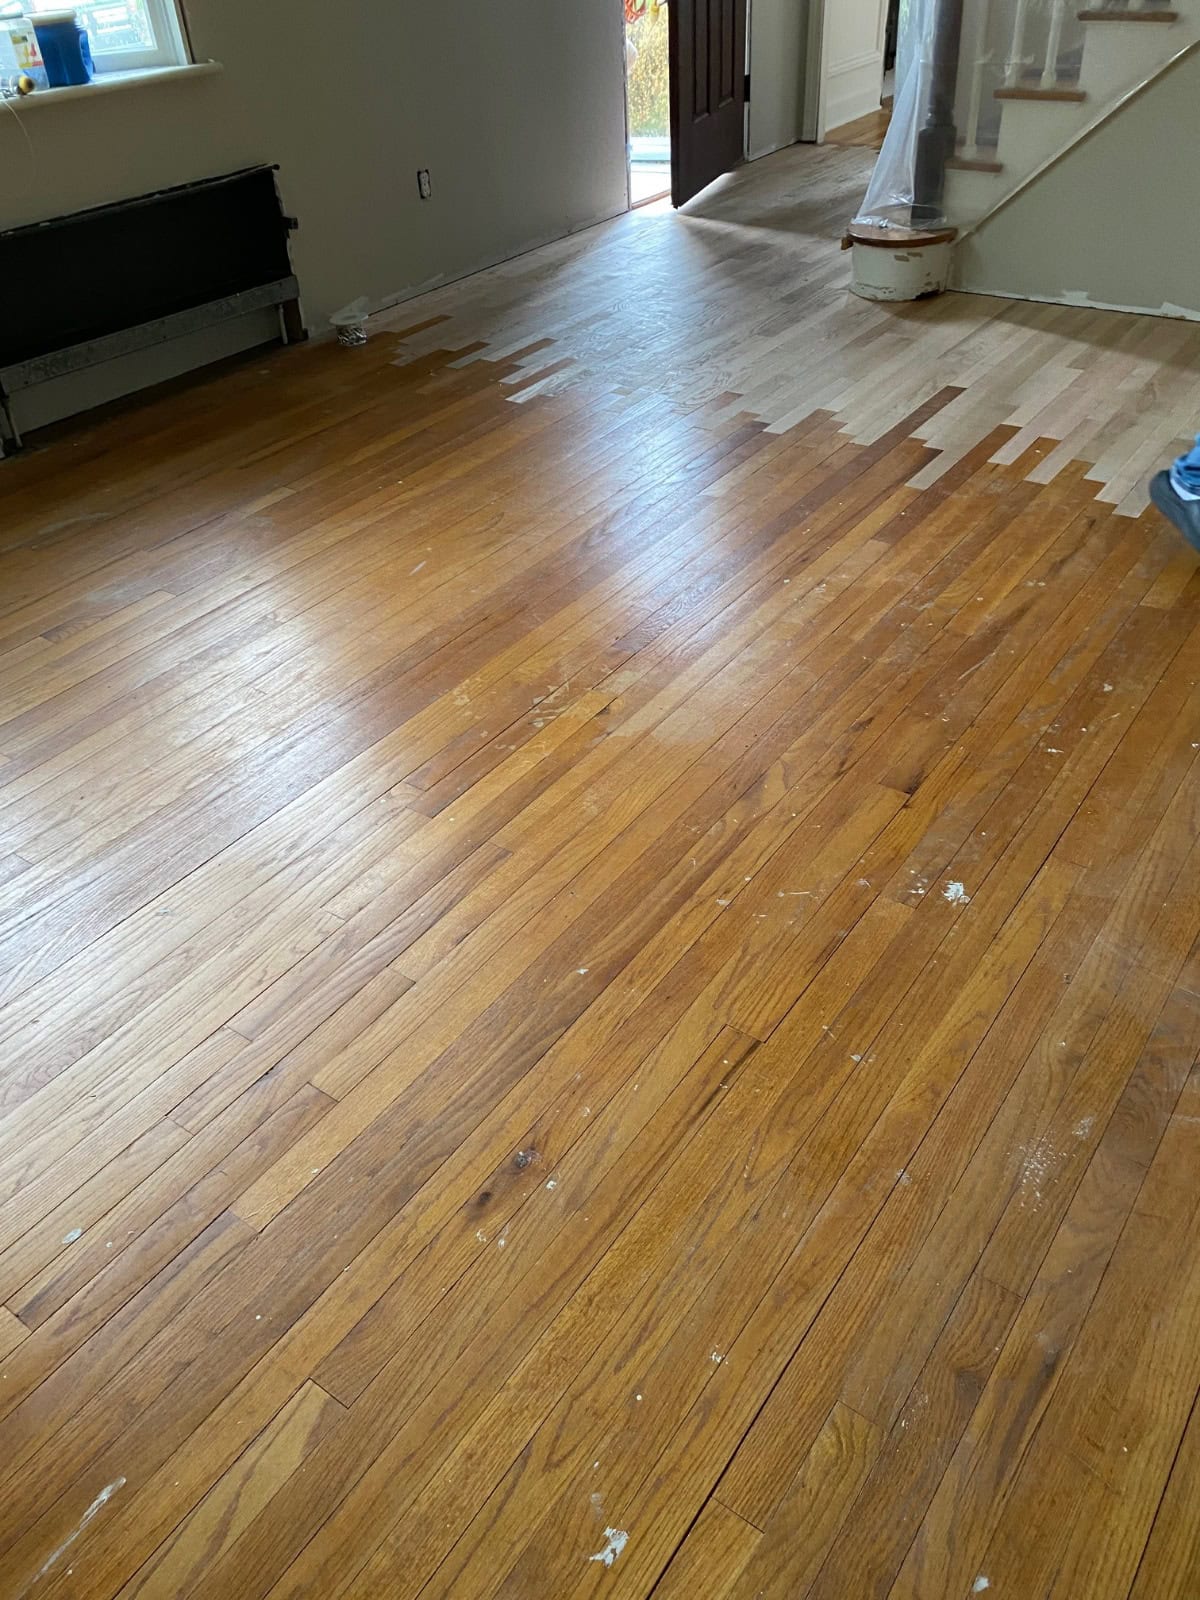
This was one of the challenging parts of the project.
Wood is a natural product. Two pieces of red oak can have different grain patterns, colors and characteristics—even when they're the same species.
Add years of aging and an older oil-based finishing system to one section, and freshly installed raw wood to another, and the difference can initially be dramatic.
That's exactly what you see during this project.
The newly repaired areas are extremely light while the existing hardwood still has its older amber-colored finish.
At this stage, it can be difficult for a homeowner to imagine that the two areas will eventually look like one floor.
That's where the sanding and finishing process becomes so important.
Sanding Old and New Hardwood Together
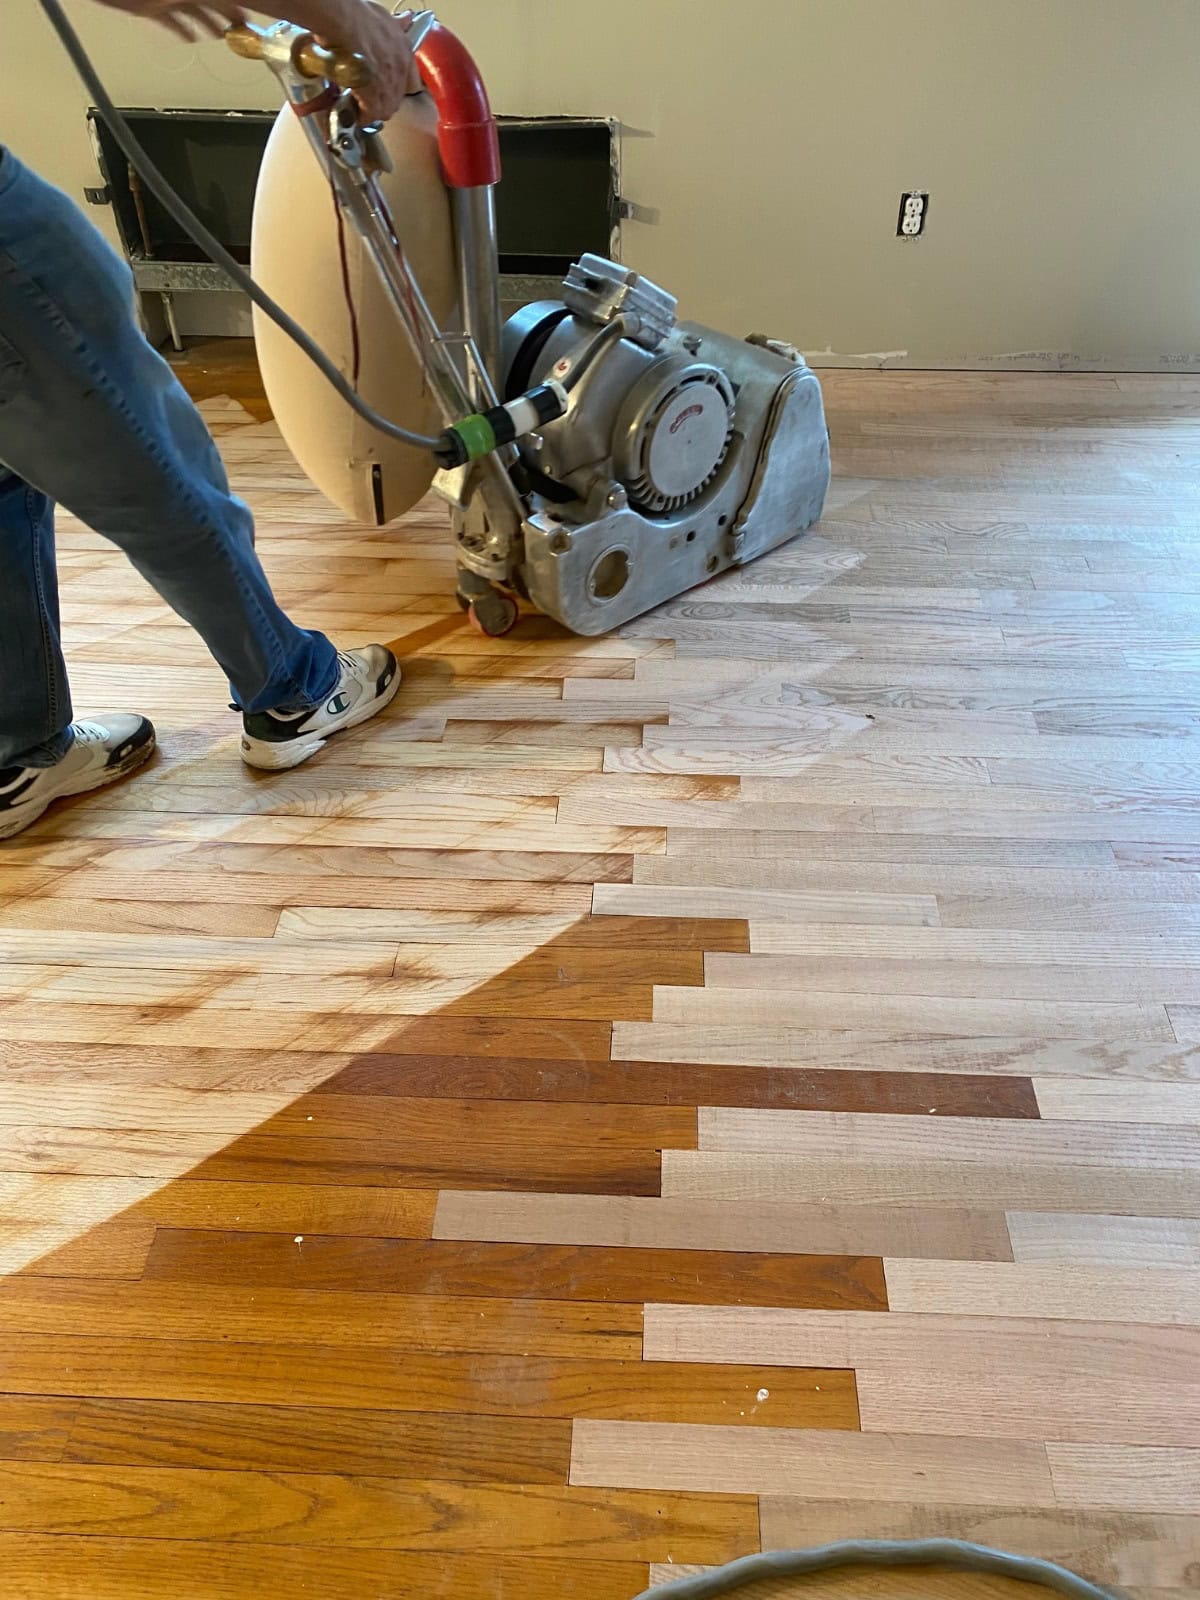
The next step was professional hardwood floor sanding.
This is where the transformation really started.
Instead of trying to make new flooring match an old finish, we removed the existing finish and brought the older flooring back toward raw wood along with the repaired areas.
Our professional sanding process also allowed us to flatten and prepare the new and existing flooring as one continuous surface.
Professional dust-containment equipment is used during our sanding process to capture the majority of sanding dust at its source and help keep the work area cleaner.
The Difference After Sanding
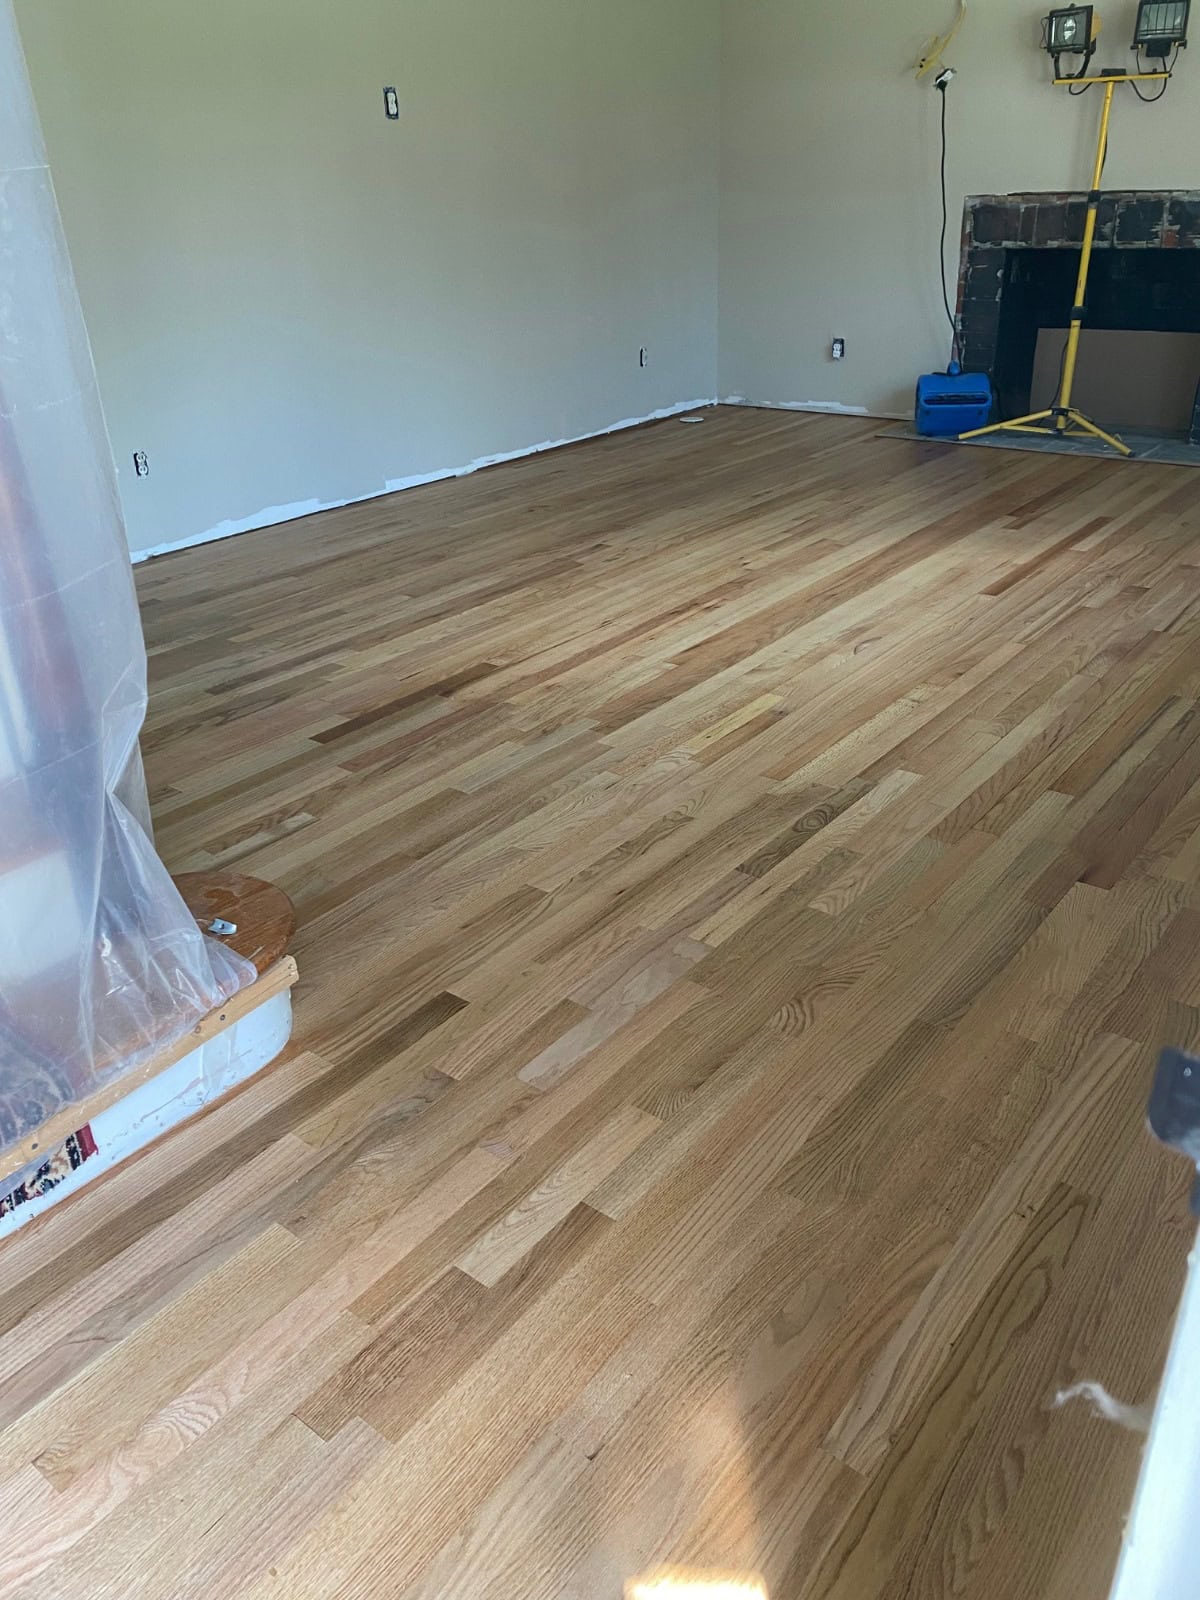
This is an important part of hardwood floor restoration that homeowners don't always get to see.
Before sanding, there was a major difference between the older finished floor and the freshly installed replacement boards.
After sanding, the entire floor began to read as one surface again.
There will always be natural variations in real wood, and we don't try to hide that character. Instead, our goal is to make repairs blend naturally with the age, species and appearance of the surrounding floor.
Why We Chose an Oil-Based Finish for This Simsbury Home
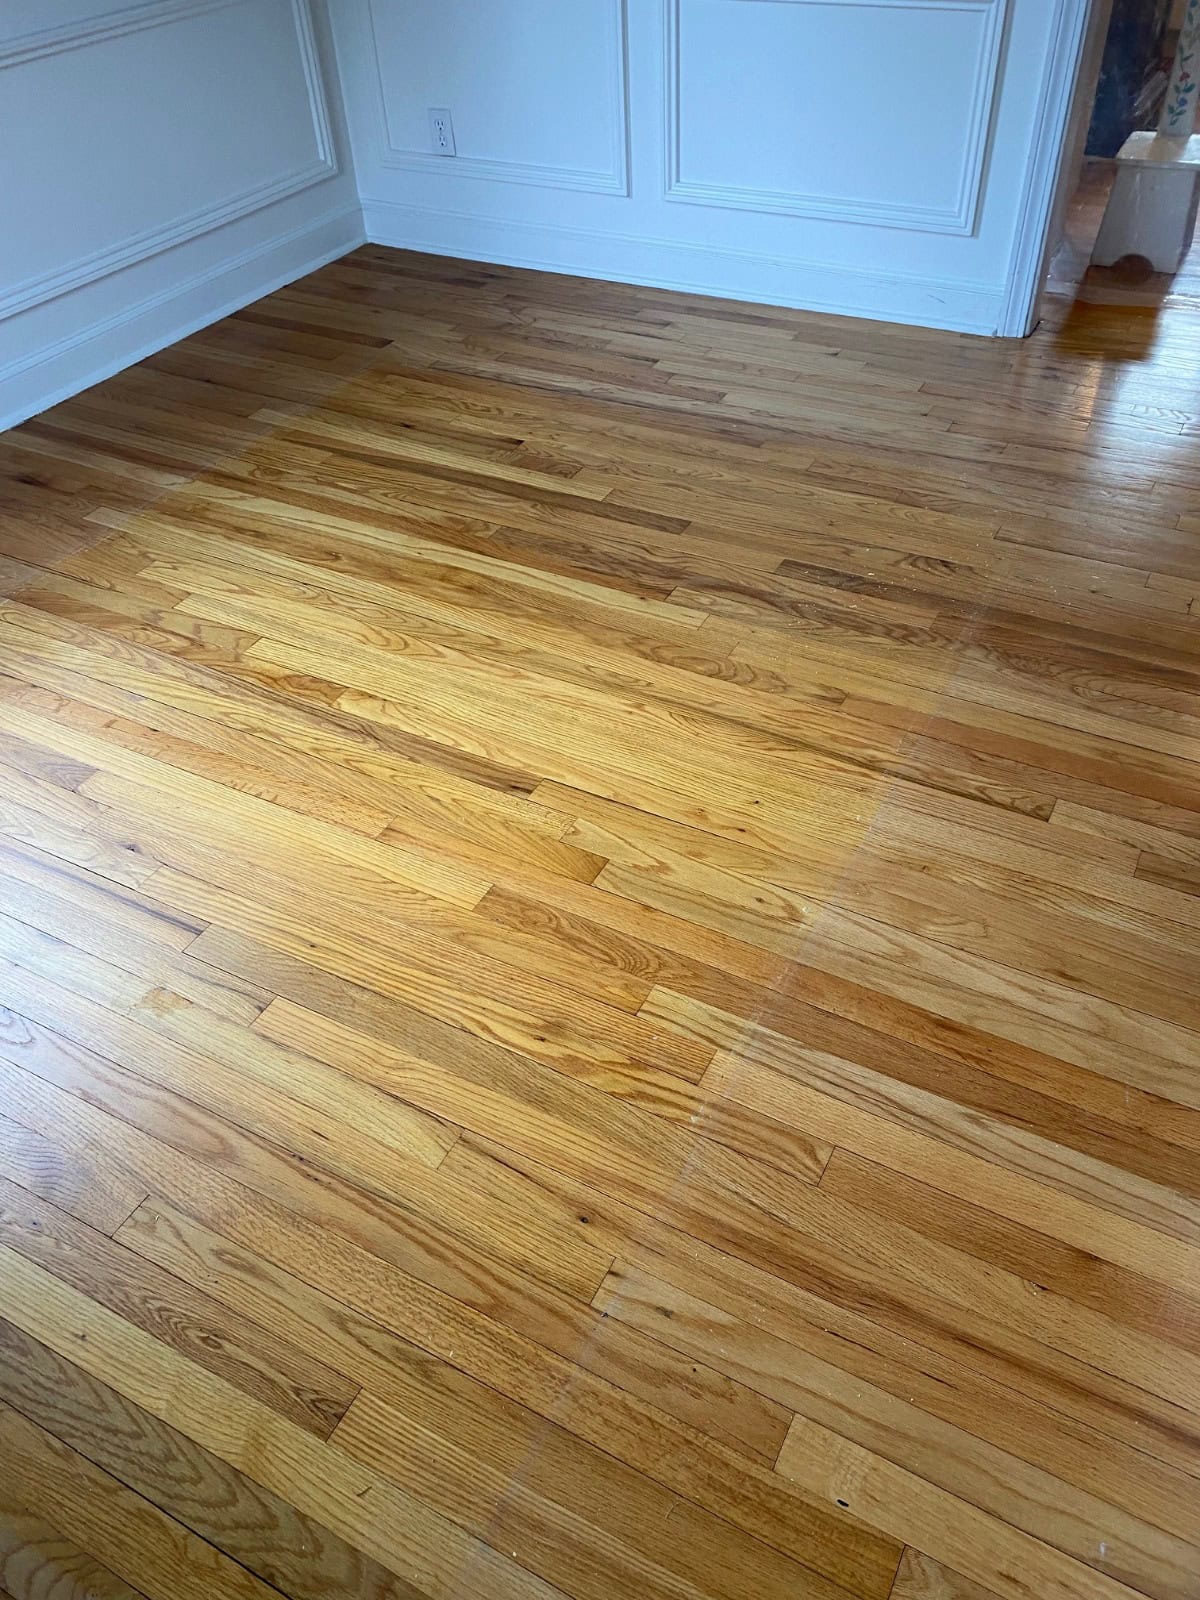
Not every homeowner wants today's very light, raw-wood appearance.
That's why we don't approach every wood floor refinishing project with exactly the same finishing system.
This homeowner liked the traditional warm honey and amber tones associated with an oil-based hardwood floor finish.
That made an oil-based system a good fit for both the homeowner's preference and the character of this particular floor.
After sanding and preparing the hardwood, we applied one coat of commercial sealer followed by two coats of oil-based finish.
The finishing system brought warmth back into the red oak, enhanced its natural grain and helped bring the newly repaired sections and older flooring together visually.
The Finished Floor — Now Try to Find the Repair
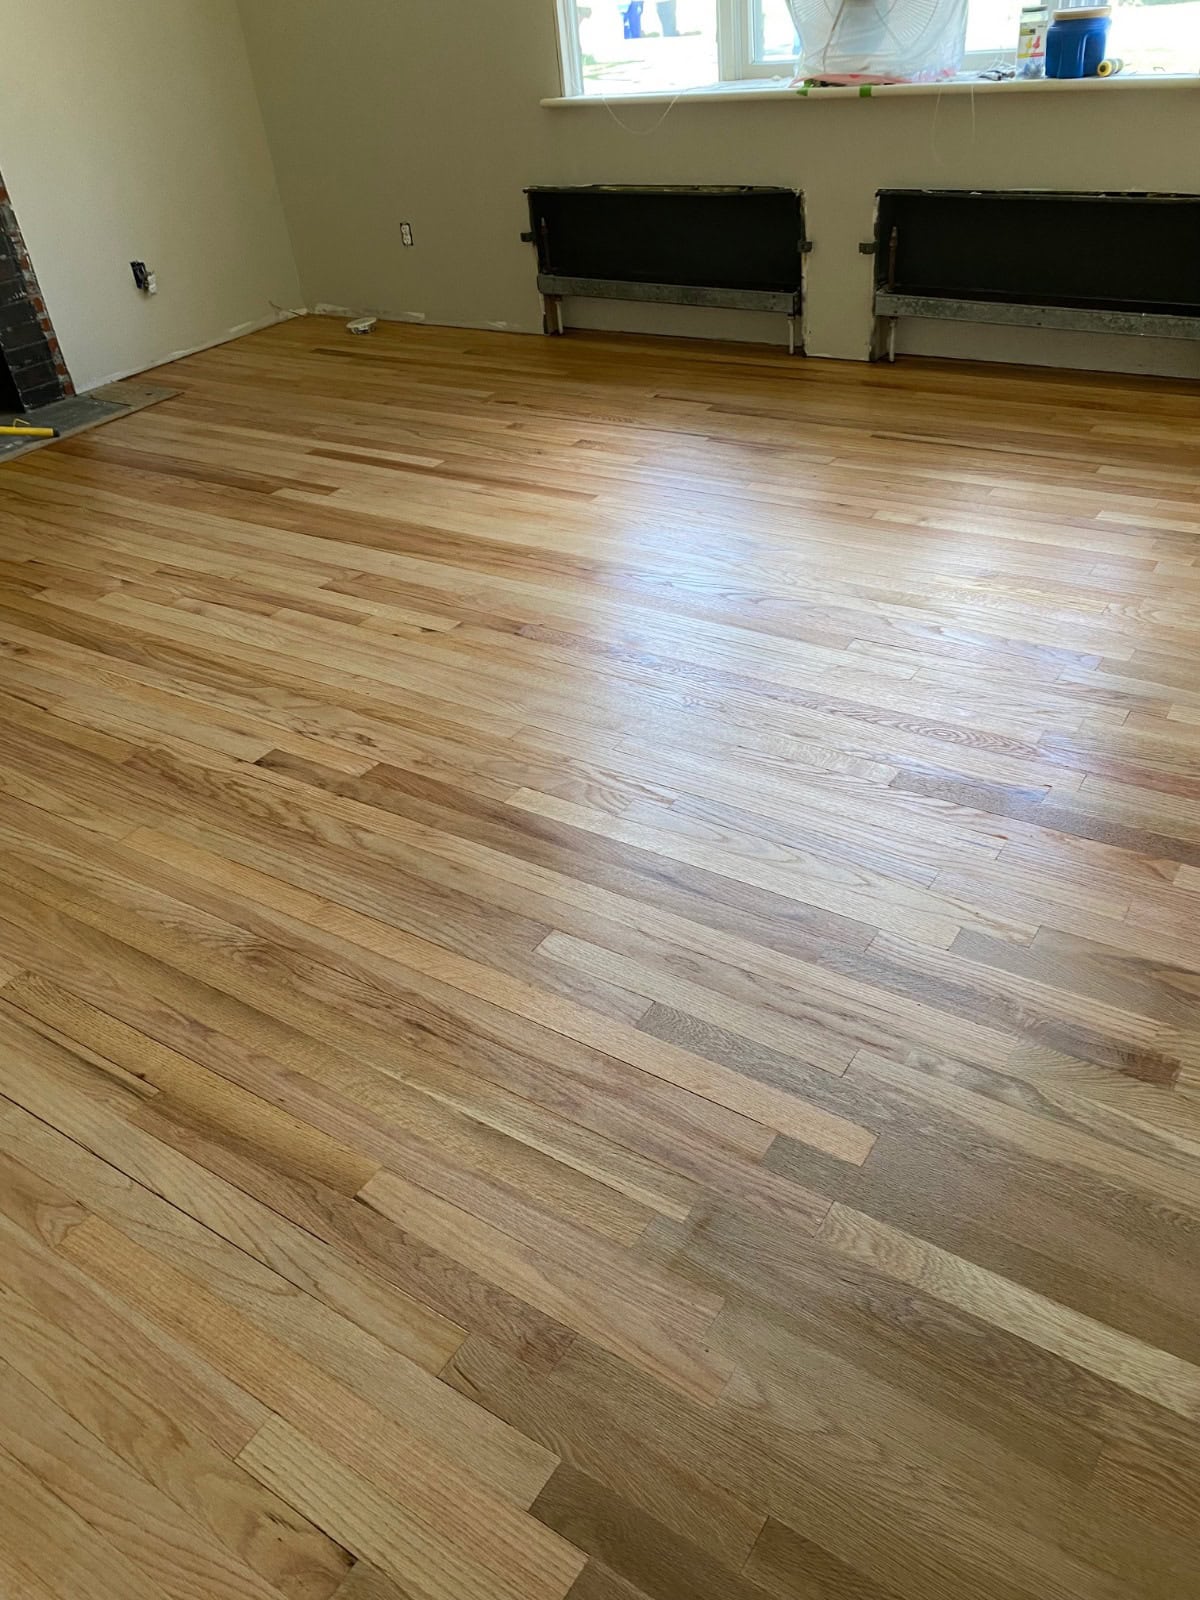
This is what made the project so rewarding.
Go back and look at the photographs showing the raw replacement boards woven into the older flooring.
Then look at the completed floor.
The repair that was so obvious during the installation and sanding process is now extremely difficult to pick out.
That's the purpose of properly toothing a hardwood floor repair.
We don't want someone's eye immediately drawn to a rectangular patch or a straight line across the room. We want the repair to become part of the natural variation of the hardwood floor.
The homeowner was extremely pleased with the finished project and later gave us a great review.
For us, that's what a successful repair looks like.
You know exactly where the repair was made because you saw us do it—but when the job is finished, you have to look for it.
Traditional Hardwood Floor Repair Takes Experience
There is an important difference between replacing damaged boards and making those replacement boards look like they have always belonged in the floor.
Projects involving existing hardwood require decisions about board selection, staggering, grain and color variation, sanding and the finishing system.
As a member of the National Wood Flooring Association (NWFA), Patrick Daigle Hardwood Flooring continues to use professional hardwood flooring methods developed specifically for repairing, sanding, installing and finishing real wood floors.
Our family has been working with hardwood flooring for four generations, with family flooring history dating to 1927 in Maine and our Connecticut operation beginning around 1972.
That experience becomes particularly important on projects like this one, where the goal isn't simply to make an old floor shiny again.
The goal is to repair it correctly and preserve the character of the original hardwood.
Hardwood Floor Refinishing & Repair in Simsbury, CT 06070
Patrick Daigle Hardwood Flooring provides hardwood floor refinishing, wood floor refinishing, hardwood floor repairs, dust-containment sanding, hardwood floor installation and stair refinishing throughout Simsbury, Connecticut 06070 and the surrounding Farmington Valley.
This particular project was completed in the Firetown Road area of Simsbury, where we repaired the existing red oak by toothing new flooring into the older hardwood, professionally sanded the floor and finished it with a commercial sealer and two coats of oil-based finish to produce the traditional warm tones the homeowner wanted.
We also serve nearby West Simsbury, Weatogue, Avon, Canton, Granby and Farmington.
For homeowners with damaged hardwood, missing flooring, remodeling changes or areas where new hardwood needs to be blended into an existing floor, replacement isn't always the only answer.
Sometimes a carefully executed hardwood floor repair can preserve the original floor—and make it difficult to tell there was ever a repair at all.